


There comes a time when we have to sell, donate or recycle our computers. Most people barely invest any thought into how to safely and securely dispose of their hard drives. The hard drive serves as the backbone of our computer. It contains essential data that is personal and private and can be detrimental if it ends up in the wrong hands.
What is hard drive?
The hard drives or Solid State Drives (SSDs) that we use in our Macs and computers to store and back up our data are sometimes damaged beyond repair. Other times, they run out of space and need to be replaced. There is also the option of restoring and repurposing them, but most often than not, a replacement with a better, more efficient option is necessary. Continuous advancements in technology also mean that acquiring the latest ones will boost our computer’s performance by leaps and bounds.
Merely throwing away your hard drive or dropping it off at a recycling center can be dangerous. These drives contain personal data that we might not want anybody else to access. We need to take care of this most methodically, and strategically so unidentified persons can not access and recover that information.
Tips to dispose of your hard drive securely
Most computers come with Solid-state drives (SSDs) and hard disk drives (HDDs). The HDDs are disks coated with magnetic material. They work in a fashion remarkably similar to a CD and are read by a sensor at the end of an arm. These hard drives are compassionate, and numerous ways exist to extricate sensitive data from them even after disposal. That is why it becomes essential that they are disposed of to make the data entirely inaccessible.
Fortunately, there are several ways we can adapt to wipe HDDs. These consist of a combination of physical and digital tools.
Wiping your SSD/HDD before you donate or sell it
This is the most used technique to erase their data most safely and securely. Before starting the process, we must back up our data if there is something we would like to keep. It is always a good idea to make two or three copies of your data and store it internally and externally. It never hurts to have an extra layer of backup just in case.
Wiping your PC
We first need to figure out whether our Windows PC uses a hard disk drive (HDD) or a solid-state drive (SSD). Most laptops and desktops contain an SSD, but there is an easy way to find out. Go to your device’s settings and type “Defragment” in the search bar. Click on the option, “Defragment and Optimize your devices.” A window showcasing the “Media Type” of your device will open. Underneath this column is where the type of hard drive your computer uses will be listed. Knowing the kind of hard drive our computer uses, we proceed with two options at our disposal.
1. Reset: In most cases, wiping our PC involves reformatting the drive and reinstalling the windows by resetting. In the case of recycling or selling, this function makes it almost impossible for other individuals to access our data, especially if it has also been encrypted.
2. Erasing securely using third-party tools: If doubts about the safety and security of our data persist, there are several other tools we can use to erase our data from the hard drive safely. Some of these tools are the DBAN, DiskWipe, and Eraser.
Additionally, reformatting the drive works for all operating systems. All of them contain built-in tools that can help clear your drive. They all have different names, such as Disk Management in Windows, Disk Utility in Mac OS, and Disks in Ubuntu. Below is an example of wiping your hard drive in Windows for illustrative purposes.
A step by step guide to wipe your HDD in windows 10 and 11
- Open settings, go to system, click on “Update and Security”, and select “Recovery.”
- Look for the option “Reset this PC” and click “Reset.”
- For Windows 10, click on “Get Started.”
- Select the option “Remove Everything”, and in case you plan on keeping your device, select “Keep my Files.”
- Select “Reinstall Windows” via “Cloud Download” or “Local reinstall.”
- Go to “Additional Settings” and select “Change Settings”. Toggle “Clean Data” to on. This takes a bit longer but is the most secure option.
- Select “Reset” to finally begin the process.
How to destroy your hard drives
This option sounds the most fun. It’s time to get our favorite hammer or baseball bat and get to work! Getting some pent-up aggression and frustration out while simultaneously getting a task done sounds like a brilliant idea. While this sounds fun, it also can be slightly dangerous, so it is always a good idea to start slowly by dissembling our hard drive first before we take our bat to it.
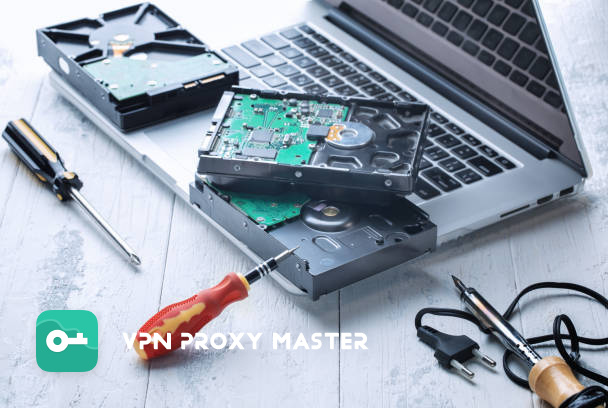
This option does not require the use of sophisticated tools. We need some screwdrivers (although it is best to use ones specially designed for use with computers). We start by unscrewing every screw we can see with the naked eye. However, not all screws can be unscrewed, so keep some pliers and a flat head screwdriver in case we have to resort to violence. After successfully unscrewing, we need to extract the shiny metal disks from the HDD case. Now that we have the disks, there exist a multitude of different options to destroy them.
How to disassemble your hard drives
In addition to that, the size, age, and the drive’s platter all make a massive difference in the techniques we use to take them apart. Thus, it is imperative to make sure we are familiar with all of those things before deciding to inflict damage. If our platters are made of glass, then that is a no-brainer. We can shatter them using a heavy blunt object. Goggles and gloves are necessary as the glass is fine and sharp. We do not want any accidents.
Moreover, if the platters are made of aluminum, there are several options we can choose from. The first involves soaking the drive-in acid. This is not for the faint-hearted. Acid can be hazardous if misused. The next is scratching the hard drive (all over) with a screwdriver or a sharp object. We can also use a knife to poke holes in it; get creative! Although we do not recommend doing the latter, and safety is of utmost importance, it is best to work with whatever tools you have on hand by taking the necessary precautions.
Demagnetizing them and defacing them with a grinding tool can also work, but these are more advanced techniques and should only be used by professionals or under supervision.
Encrypt your HDD when buying a new hard drive
Encryption is a great preventative measure to protect ourselves from abuse. This is a great strategy to ensure that nobody can access our data if we lose our belongings. Our electronic data needs to be treated with as much care as our physical belongings are. Encrypting our data is akin to locking our house when we leave.
The process itself involves scrambling a file or a website to such an extent that only an individual with a specific key will be able to unscramble it. VPN Proxy Master will help us secure all our online activity with a single click of a button. Once connected to a remote server, our online activity is redirected and our Internet Protocol (IP) hidden. Any information coming out of our computer is now encrypted.
Windows and Macs already have built-in encryption software like BitLocker and FileVault that need to be activated. They will automatically encrypt all your files once activated. Encryption software works incredibly well with a reliable VPN service such as VPN Proxy Master to protect our data from online interceptors.
Conclusion
As digital security gets more robust, governments and criminals choose to go after laptops and storage devices to access our data. Encryption software and VPNs such as VPN Proxy Master can protect us from invasions of privacy. They can also serve as extraordinary preventative measures in case of lost belongings and make our data unintelligible to strangers.


